Trixbox
Contents
Running Trixbox in VMware on Windows
Download:
VMware player (free)
- ISO CD-image (Direct link)
Things to know
- document the startup of VMware ***
Once the Trixbox Linux is up and running, the following things hold:
- The default root-password is "password".
- Entering the VMware console is done by clicking on it. Leaving is done by pressing CTRL + Alt at the same time.
- When opening the VMware configuration-file in VMware player, you probably get some warnings about the location of your CDrom drive. This can be ignored. (no CDrom is needed)
- Using the latest version of VMware player, the hardware-detection will detect a change of network card. Please select "Keep configuration" and in the next screen enter the right IP-configuration (needed only once)
- Each instance of VMware player running this version of Trixbox will take on average about 250 MB of RAM.
- Each VMware image of this version of Trixbox needs about 1.66 GiB of hard disk space. This can increase up to a max. of 7.3 GiB (max size of virtual filesystem + 256 MiB VMEM-file) The VMware-images can be compressed for transport to about 570 - 600 MB
Editors
The config files of Asterisk are located in /etc/asterisk/
Editing those files with the installed editor vi, is rather tedious. Therefore we installed Emacs to do the editing. Since Trixbox is based on CentOS, it is possible to use the CentOS RPM's to install Emacs.
The 2 RPM's needed for Emacs are located at the following URL's:
ftp://ftp.nluug.nl/pub/os/Linux/distr/CentOS/4.4/os/i386/CentOS/RPMS/emacs-common-21.3-19.EL.4.i386.rpm
ftp://ftp.nluug.nl/pub/os/Linux/distr/CentOS/4.4/os/i386/CentOS/RPMS/emacs-nox-21.3-19.EL.4.i386.rpm
Using the program wget, it is possible to download these. After downloading, the RPM's can be installed with "rpm -i". We also created some smaller URL's, which is easier to type ;)
mkdir install
cd install
wget http://turl.nl/99
wget http://turl.nl/100
rpm -i emacs-common-21.3-19.EL.4.i386.rpm
rpm -i emacs-nox-21.3-19.EL.4.i386.rpm
The name of the emacs-executable is "emacs-nox"
Connecting with the Trixbox-shell
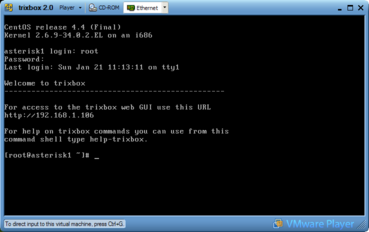
It is possible to use the Trixbox shell via VMware (player), but this has one mayor disadvantage. You can't use cut 'n paste. However, it is also possible to interface over a SSH connection, using e.g. Putty. The IP-adress of the Trixbox installation is given at the login (using VMware).
To log in, the standard root-password is "password".
Running Trixbox in VMware on Linux
In the following we assume that the VMware image of TrixBox has already been downloaded to some directory, for instance
/home/scratch
First of all, VMware needs to be launched from the command-line
csg9101@wingtip114 [~/bin] : vmware &
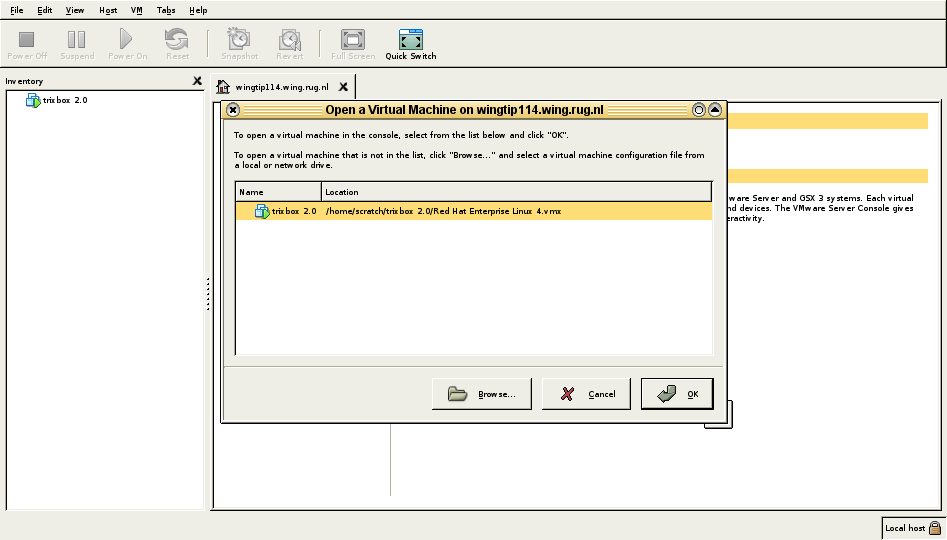
After a while VMware will be up and running. Then the next step is to select open an existing Virtual Machine:

At this point, the CentOS TrixBox system will boot. Eventually a Linux login shell will appear.
TrixBox starts up with a default network configuration based on IPv6; this won't work in most cases. To remedy this it is necessary to log in on the TrixBox as root and to configure the network subsystem.
This configuration is two-fold: on the VMware side it is necessary to set up network routing, as documented at network_configure_ws.
In our case, the present network is tightly configured by DHCP in such a way that using an IP in the same range as the machine's IP is not an option and other IP's are ignored. Therefore Network bridging isn't an option; we use NAT instead.
On the TrixBox side the networking infrastructure should happen according to network_nat_advanced_gsx
Hereby we have the following VMware config file (/etc/vmware/vmnet8/nat/nat.conf.)
# Linux NAT configuration file
[host]
# NAT gateway address
ip = 192.168.5.2
netmask = 255.255.255.0
# or ip = 192.168.5.2/24

# enable configuration; disabled by default for security reasons
#configport = 33445

# VMnet device if not specified on command line
device = /dev/vmnet8

# Allow PORT/EPRT FTP commands (they need incoming TCP stream...)
activeFTP = 1

# Allows the source to have any OUI.  Turn this one if you change the OUI
# in the MAC address of your virtual machines.
#allowAnyOUI = 1

[udp]
# Timeout in seconds, 0 = no timeout, default = 60; real value might
# be up to 100% longer
timeout = 60

[incomingtcp]
# Use these with care - anyone can enter into your VM through these...

# FTP (both active and passive FTP is always enabled)
#      ftp localhost 8887
#8887 = 192.168.5.128:21

# WEB (make sure that if you are using named webhosting, names point to
#     your host, not to guest... And if you are forwarding port other
#     than 80 make sure that your server copes with mismatched port
#     number in Host: header)
#      lynx http://localhost:8888
#8888 = 192.168.5.128:80

# SSH
#      ssh -p 8889 root@localhost
#8889 = 192.168.5.128:22

[incomingudp]
# UDP port forwarding example
#6000 = 192.168.5.128:6001
bxjasbcdkja
